Friday, June 30, 2017

Easy Beginner Tutorial: How To Make A Basic Elephant Necklace


I remember when I first got the idea to make jewelry. When it came to the technical aspect of tools and components, as a beginner, I had absolutely no idea where to start. 

I had been making stained glass and also making mosaics out of stained glass and vintage broken china, when I started setting aside certain china shards that I would come across that just seemed too special to be put into a mosaic. I knew they had to be the main feature in whatever way they were to be recreated, so I set them aside to hopefully one day turn them into jewelry. 

When the day came to turn my soldered china prototypes into actual wearable pieces of jewelry, I had to teach myself everything. Learning what the different components were and what they were used for, learning about different metals and chains and wire gauges was a bit confusing at first, but I just took my time and figured it out the best I could. Then came the tools. Some looked like they were from another planet! I quickly found out that there were a lot of tools that I really DIDN'T need, and that the most important thing I needed was my own creativity and lots of good lighting. 

But the whole point of this blog post is that we all have to start somewhere. When you first start out, even the most simple necklaces can seem confusing when you're not sure what goes where. 

In this beginner tutorial I will show you how to assemble a simple chain necklace with a chain, clasp, and charm. I chose an elephant charm for my project. You can use any type of charm you like. This basic assembly will become second nature to you quickly as you create more jewelry. 

Supplies needed:
Jewelry chain in desired length (I use 18")
Lobster-claw style clasp
(1) 4mm jump ring
(2) 5 to 5.5 mm jump rings
2 pair of basic jewelry pliers (sometimes called chain nose pliers)


First, assemble your supplies. It's always good to have extra jump rings in case you accidentally bend one out of shape. Work in a well-lit area. Reading glasses work great for helping to see small components! 


First we will add a jump ring to your charm (AKA your component, or your focal piece). Charms sometimes come with jump rings already attached. Yay!  Sometimes they don't. So we'll easily add our own. Important: Make sure your large jump ring that you are going to attach to your charm is big enough to fit onto your chain. If it isn't, get a larger jump ring, or get a smaller gauge chain. 

First we have to open the jump ring to thread our charm on it. We always use two pairs of pliers to open jump rings. Using two pairs of pliers is important because the jump ring needs to be twisted with both ends turning away from each other (see photo above). 

To open your jump ring, hold the jump ring with the seam side up, use one pair of pliers in each hand to grip the jump ring ends where they meet. Now use a small twisting motion to separate the ends of the jump ring so that one end goes up and one goes down (see above photo). The most important thing is that you do NOT pull the ends apart from each other left to right or you will land up with a misshapen jump ring that will never close properly. 


Once your jump ring is open, thread your charm onto your jump ring as shown in the photo above. 

Now close the jump ring the same way you opened it - using two pair of pliers, one in each hand. Just grip the ends of the jump ring and carefully twist them back together until they meet. If you hear a clicking sound when the ends come together, that's good! 


Now thread your charm onto your chain by putting the chain through the jump ring. 


To finish your necklace all you need to do is attach your clasp and jump rings to your chain ends as shown in the above photo. To do this, open your smaller (4mm) jump ring using the same technique above, and thread the loop that's on the bottom of your clasp onto the jump ring. Then thread the end of your chain onto the same jump ring and then close the jump ring as we did above. 

Now attach your last, larger jump ring to the opposite chain end. This jump ring will serve as the catch for your clasp. That's it! You've put together your first simple chain necklace. 


What did you think? Easy? Maybe next time we will add some coordinated beads...

Let me know what you'd like to see!


Have a great week!
love,
 Laura


My broken china jewelry is always available for purchase at https://www.etsy.com/shop/dishfunctionldesigns


article copyright ©Laura Beth Love 2017 all rights reserved

Friday, June 16, 2017

New Broken China Jewelry In My Etsy Shop!


Hi friends, I hope you all have been enjoying the weather where you are - we had a little heatwave here in PA this week but I'm happy for the hotter weather to finally get here! I love spending time outside!

I look forward to the end of the school year as much as my daughters do, and we sure had a busy one this year. Both of my girls worked so hard this year, and both received academic awards. I couldn't be more proud of them. Now we finally get to spend some more time together, yay! 

Last week my daughter Erica finally picked up the soldering iron for the first time! She made herself a wire and stone bead ring from my Soldered Alchemy book and it turned out great! I hope she decides to continue learning how to solder and make jewelry! 


As always, here's what's new in my shop so far this week. I have more on the way!


If you've purchased from me and want to show off your jewelry please send me a photo of you wearing it and I would LOVE to feature it on my blog and/or my Dishfunctional Designs Facebook page! Feel free to send me photos through Facebook or email them to me at sales@dishfunctionaldesigns.com or even through an Etsy message. I LOVE seeing folks enjoying what I make so send me those photos! 


All items shown above are available for purchase at https://www.etsy.com/shop/dishfunctionldesigns


Have a great week!
love,
 Laura


My broken china jewelry is always available for purchase at https://www.etsy.com/shop/dishfunctionldesigns


article, images, and designs copyright ©Laura Beth Love 2017 all rights reserved

Friday, June 9, 2017

DIY Tiered Jewelry Organizer Made From Vintage China Plates & Teacups


Today I'm going to show you how you can turn your thrift store and flea market teacups, plates, and saucers into a pretty tiered organizer. This organizer is great for holding jewelry or other small collections, makes a unique candy dish, and is certainly a conversation piece. All you need are a few supplies. It's easier than you might think! 

Assemble your supplies
First, let's gather our supplies. For this project you will need a variety of old plates, saucers, and teacups. You will need a tube of E6000 adhesive. This is available at hardware stores, department stores such as Target, and even in some grocery stores. Due to the materials we will be gluing, I do not recommend using any other adhesive. Hot glue will not work, nor will water-soluble school glue, so get yourself a tube of E6000. 


You will need a disposable popsicle stick or craft stick to help spread the glue, and you will need some old newspaper to cover and protect your tabletop while you work. 

A paper plate or a piece of waxed paper comes in handy when you need to set your glue-covered craft stick down, so you may want to keep one of those at your workstation too. And remember, when using any type of adhesive, always be sure to work in a well-ventilated area.


Choosing your china
For the organizer we are going to make today, you will need three plates and three teacups. From the bottom up, our organizer will look like this: plate, teacup, plate, teacup, plate, teacup.

To keep your tiered organizer from being top-heavy and toppling over, we need to build our organizer so that the largest and heaviest plates and cups are on the bottom, and the smaller and lighter ones are on the top. Think about this when you are choosing your china. 


Before we glue any of our pieces together, we will first pick them out and stack them up so we can see how our finished project will  look.

First, choose a heavy plate for the bottom so that your organizer has a sturdy base. Remember, we are going to be stacking china on top of this plate, so it has to be large and heavy so that your "china tower" does not topple over. Once you have chosen your base plate, set it aside and choose your first teacup that will be glued to the top of that plate. This teacup will be glued upside-down to the bottom plate. This is because the diameter of the cup's opening is (most likely) larger than the diameter of the bottom of the cup. 


Once you have chosen your first cup, set it aside next to your base plate and then choose your middle plate. This plate will be glued on top of the bottom of the teacup that you just chose. Make sure you choose a plate that has a smaller diameter than your base plate. Your middle plate should also be lighter than your base plate. Once you have chosen that plate, try it out to see how it looks stacked up and then set it aside. 

Note: if using elongated plates, you can either line them up or stagger them, as shown in the photos below:

Plates lined up with each other. 

Plates staggered.

Next, choose your second tea cup. This cup will be glued upside-down on top of the middle plate that you just chose. 


Once you have chosen your second teacup, choose your third plate. This plate will be situated on top of the bottom of the teacup that you just chose. Choose the smallest and lightest plate for this position. A saucer often works great for this position. 


Finally, you will choose your third and last teacup to complete your china tower. This teacup will be glued right-side-up on top of the small plate or saucer that you last chose. 


Now that you have all of your china picked out and you know what is going where, it's time to glue them together! Before you glue, make sure all pieces are clean and dry. We will glue them together from the bottom up.

 Open your adhesive and carefully apply a ring of glue around the rim of the first (bottom) teacup, and then place the teacup, glue-side down onto the top center of your bottom plate.


Now - it is up to you whether you want to continue gluing right away, or wait until those two pieces have dried. I recommend allowing them to dry overnight before adding the next piece. Either way, next you will glue the center plate to the bottom of the bottom cup, allow that to dry, and then add your second cup  - once again upside-down, and once that is dry add your small plate, and then your final top cup, which you will glue to the small plate right-side-up. 

Another option is to forgo the top teacup and use the small plate as your top tier. It's a matter of personal taste. Do what you think looks best. Below are two different ways of stacking elongated plates - lined up or staggered.


Staggered elongated plates


I hope you enjoyed this tutorial! Please share this post with your friends and remember, I always love to see your creations so feel free to email them to me via my Etsy shop or  on my Facebook page (links in the right hand sidebar).


What do you think?


Have a great week!
love,
 Laura


My broken china jewelry is always available for purchase at https://www.etsy.com/shop/dishfunctionldesigns


article copyright ©Laura Beth Love 2017 all rights reserved

Wednesday, June 7, 2017

Amazing Outdoor Baths and DIY Garden Showers


Usually we think of swimming pools and hot tubs as being outdoors and showers and baths as being indoors - but let's face it, people have been bathing out in the open in the great outdoors for ages. 

Now, I'm sure some of the examples below are from resorts and tropical vacation spots - - but don't let that stop you from adding a little bit of luxury to your own property. Just be sure you are not within your neighbor's view! Check out these amazing outdoor showers and baths and then read on to find out how you can make your own! 


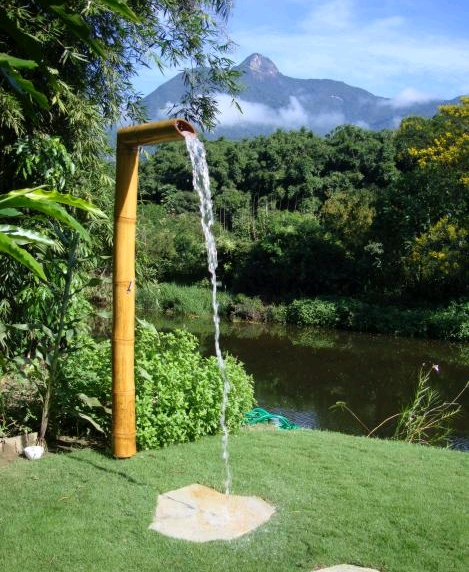
Beautiful outdoor shower


This forest bath looks like something from a fairy tale


This outdoor shower, made to look like a tree, blends right in with the landscape.


Tropical shower.


This looks amazingly peaceful.


Garden shower from Birmingham Home and Garden


What a view.


Outdoor shower from Sweethomestyle


Outdoor shower by Los Gatos Interior Designers & Decorators Chelsea Court Designs


Into DIY? Then how about making your own outdoor shower? Check out these examples:


That has got to be cold!


Here are directions for how to make one from Bob Vila


DIY outdoor shower from Sweet Paul


Upcycled mirror and license plate make a cute accessory for your outdoor shower.


What do you think?
Which is your favorite?


Have a great week!
love,
 Laura


My broken china jewelry is always available for purchase at https://www.etsy.com/shop/dishfunctionldesigns


article copyright ©Laura Beth Love 2017 all rights reserved